Backlog Management
AngusTester's
Backlog Managementprovides users with clear operational guidance for managing backlogs, covering four core functions: priority setting, deadline adjustment, iteration allocation, and assignee designation. The process is divided into three phases: basic preparation, execution, and validation.
I. Basic Preparation
System Access Permissions
Onlyadministratorsorproject memberscan modify Backlog content.Accessing the Backlog Interface
Navigation path: SelectProject Space → Tasks → Backlog
⚠️ If this menu is not visible, contact the administrator to request "Tasks" module permissions.
II. Core Operations
1. Priority Management
Description: Dynamically adjust task priorities based on business value.
Functional Scope: Supports five priority levels (Highest/High/Medium/Low/Lowest).
Steps:
Locate the Task
- Find the target item in the Backlog list.
- Click the "Basic Info" tab on the right.
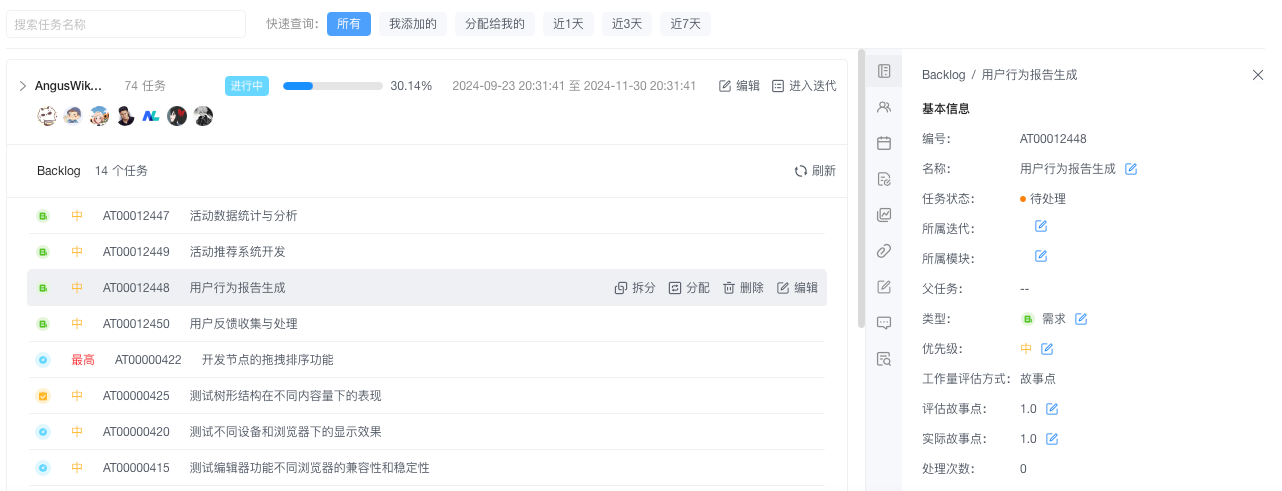
Modify Priority
markdown① Click the edit icon ✏️ next to "Priority." ② Select a new priority from the dropdown menu. ③ Move the cursor away to auto-save changes.
Notes:
⚠️ Priority changes automatically trigger notifications to relevant members.
2. Deadline Management
Description: Adjust task completion deadlines to accommodate project changes.
Functional Scope: Deadline dates cannot be earlier than the current date.
Steps:
Select Target Task
Check the box next to the task to be adjusted in the Backlog list.Set New Deadline
markdown① Click the "Date" tab on the right. ② Click the calendar icon 📅 to open the date picker. ③ Select a new deadline. ④ Click "Confirm" to apply.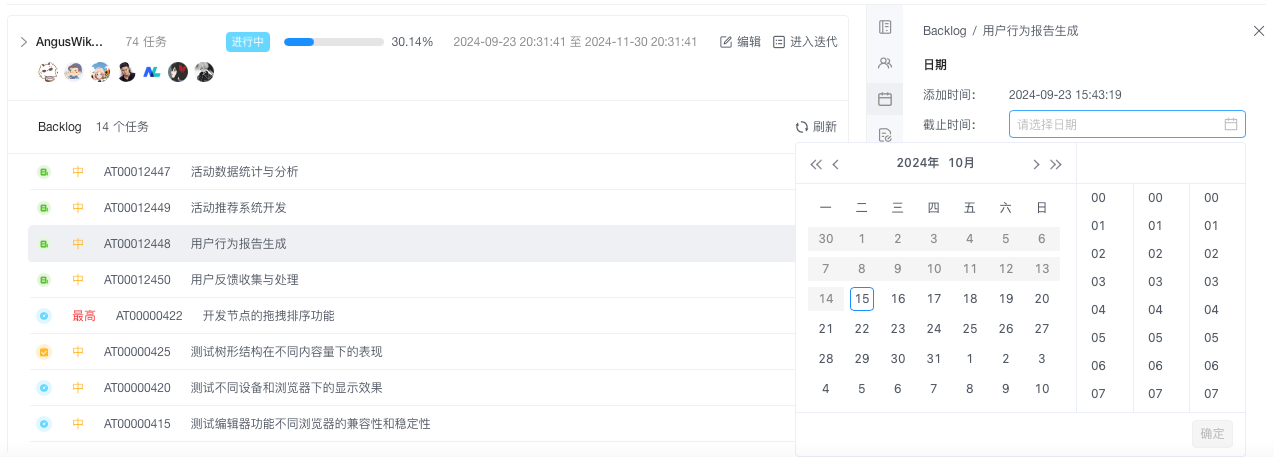
Notes:
⚠️ Extensions beyond 7 days require a "Reason for Delay" explanation.
⚠️ Overdue tasks are automatically marked as "Overdue."
3. Iteration Planning
Description: Allocate tasks to specific iteration cycles.
Status Flow:
Steps:
- Task Allocationmarkdown
① Check the target task(s) in the Backlog list.
② Click the "Allocate to Iteration" button in the toolbar.
③ Select the target iteration in the popup.
④ Click the iteration name to complete allocation.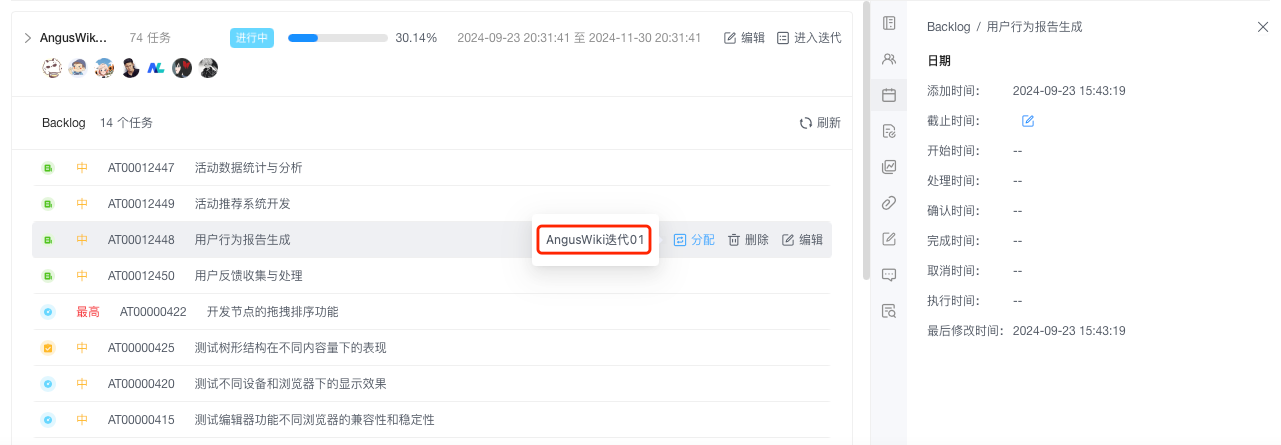
Notes:
⚠️ Avoid assigning too many tasks to a single iteration.
⚠️ Active iterations allow new task additions.
4. Assignee Designation
Description: Clarify task ownership to ensure efficient execution.
Permission Control: Assignable to current project members only.
Steps:
- Assignee Assignmentmarkdown
① Locate the "Assignee" field for the target task.
② Click the person icon 👤 to open the member selector.
③ Use the search box to filter and find members.
④ Click the selected member to complete assignment.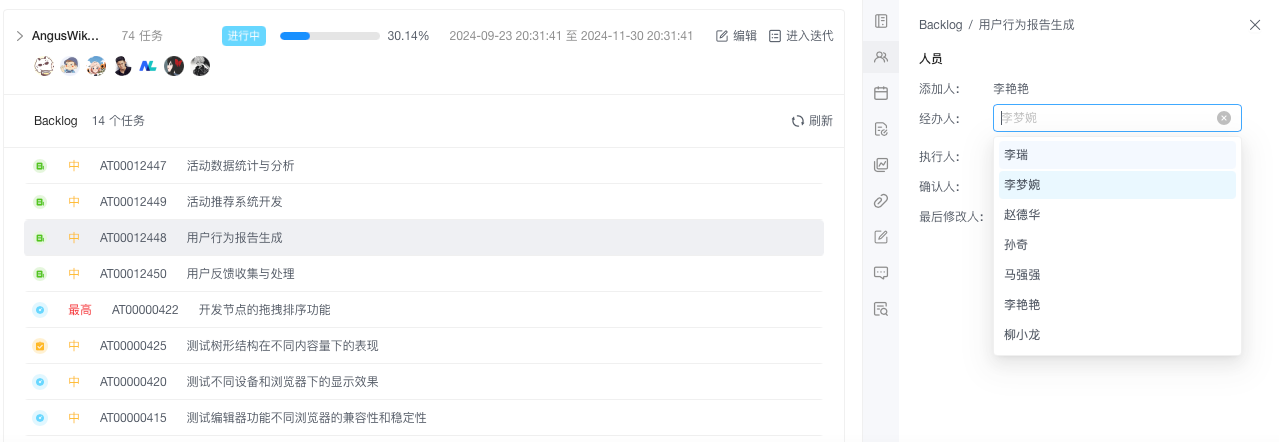
Notes:
⚠️ Only one assignee is allowed per task.
⚠️ The system will prompt for reassignment if a member leaves (TODO).
III. Validation (Optional)
Real-Time Feedback
- The system displays "Operation Successful" upon completion.
- Modified data is updated immediately.
Batch Confirmation
markdown① After allocation, tasks move from the Product Backlog to the Iteration Backlog and appear in the task list. ② Filter by "Operation Type" and "Operator." ③ Verify the last operation time and results.System Integration Validation
Operation Type Validation Location Priority Change Kanban Dashboard → Priority Distribution Chart Deadline Adjustment Personal Workspace → Task Reminders Iteration Allocation Iteration Panel → Task Cards Assignee Designation Member Workspace (Task Homepage) → My Tasks