Proxy Configuration
Complete server-side proxy setup in 3 steps:
Deploy proxy program → Configure proxy address → Verify connection statusto ensure cross-origin requests are successfully sent.
I. Prerequisites
Install Proxy Program
- Deploy the request proxy following the Install AngusProxy guide
- ⚠️ Ports
6806(HTTP) or443(HTTPS) must be opened
II. Proxy Configuration
Server-side proxyis suitable for intranet testing scenarios, whileCloud proxyonly supports public network services.
1. Server-Side Proxy Configuration (Recommended)
- Open
AngusTester→Settings→ 「Proxy」 - Enable Proxy:
☑️ Check theEnabletoggle for server-side request proxy configuration - Connection Settings:
Address format:ws://[Server IP]:6806/angusProxy(orwss://[Domain]:443/angusProxy)
💡 Example:ws://192.168.1.100:6806/angusProxy - Auto Verification:
Automatically checks when the input field loses focus; a ✅ indicates success
Note
- This method requires installing the
proxy programon a server host shared across the network. - Using server-side proxy eliminates the need for users to install proxy programs on their local machines. Once configured, requests will be sent via the server-side proxy.
2. Cloud Proxy Configuration
- Open
AngusTester→Settings→ 「Proxy」 - Enable Proxy:
☑️ Check theEnabletoggle for server-side request proxy configuration - Paste the default cloud proxy address:text
wss://bj-c1-prod-angusproxy.xcan.cloud/angusProxy
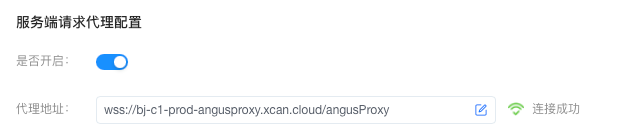
Important Reminder
⚠️ Cloud proxy cannot access intranet services
III. Verification
Interface Verification:
Successful connection displays status indicators:- ✅ Green badge: Proxy is available
- ❌ Red cross: Disconnected or failed to connect
Check Logs:
- Browser Console: Inspect connection failure reasons (e.g., network issues)
- Proxy Service Logs: Check error logs in
AngusProxy/logs/proxy.logvia the console